Wednesday, October 19, 2016

Gradual work over the last few days

Finally sanded both sides completely after chine log epoxy cured.  Then cut and glued most of the transom assembly.  Also glued and cut to size the mast core from W. Red Cedar.  Lastly, completed the bevels on bulkhead 1.  Despite others feelings towards sanding and beveling, I love them both!  While sanding is slow and monotonous I enjoy seeing the long fought for result of a smooth finish plus I somewhat lose myself in sanding.  As for planing, it was never fun until I learned grain orientation and how to sharpen a blade.  With those two pieces of knowledge a plane will truly sing!

The blurriness of this photo captures what it feels like sand 2 side panels

Redwood and Douglas Fir framing glued, seat cleat and rudder reenforcement next.  I used davlafont's method of keeping epoxied parts from wandering by tapping a small wire brad into the glued side of the framing and then snipping it off to about 2-3mm high.  This is then pushed into the wood when clamping to keep it from "sleepwalking" at night.  This small piece of a nail is left behind.

Bulkhead 1 side bevel, sanded sides in background

Mast core

Monday, October 10, 2016

Sides, bulkheads, transom, seats

Day off today allowed a lot of work to be accomplished.  Sanded 1 side and pre-coated both chine logs with 3 coats of epoxy.  Cut out all parts except for rear seat and middle seat.  Plotted cutouts in bulkhead 2 and 3.  Also, started framing transom.  However, time flies.  Wish I could dedicate more large chunks of time to the build instead of 1 - 2 hour increments.  Plan is to continue work on smaller parts (daggerboard, rudder, bulkheads, etc.) through the winter where epoxy can cure in the basement and then resume the assembly in the spring.  Others who have artificially warmed their workshop/ built heating tents for large pieces are much braver than I.   Enjoying the process, so I can wait.

Lots of parts cut out and marked

Not sure how I am going to sand the epoxy on the top and inside corner of the chine log...

Redwood is being used for some framing instead of the chine logs

It's starting to get crowded and a few too many projects...

Thursday, October 6, 2016

Sanding and chine logs glued

Chine logs cut down to length and glued to side panels.  Also completed a small amount of sanding before I need to buy more sanding pads.  Decided to use slightly smaller WRC chine logs, 43x17mm, instead of what the plans call for 45x19mm.  These still overlap the bottom by 10mm, as the plans call for.  I assume this will only effect the cutouts in the bulkheads, which I will need to remember to cut to the now smaller chine logs.  Once dry the chine logs will get 3 coats of epoxy then perhaps I will move on to shaping the stem...

Planning and pre-drilling

Clamping in process

Wednesday, October 5, 2016

Epoxy pre-coating panels

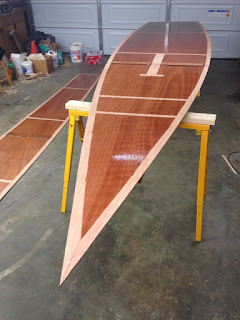
Perfect epoxy weather here in KY so with the extra help of my dad and father-in-law we pre-coated the insides of both side panels and the bottom panel using the "wet-on-wet" application method, with a total of 3 coats.  Even after tipping, we realized the foam rollers created quite a bit of foam in the epoxy.  Temps in the shop were low 70's and it was early evening with the temperature falling to upper 50's overnight.  Not too concerned as the panels will need to be sanded and we have already decided to paint the interior for the sake of utility and ability to easily hide future repairs.